
Overview#
As mentioned in my previous blog posts, I’ve found myself really enjoying building websites and apps again with coding agents or “Vibe Coding”. I’m very far from a competent web developer or any developer for that matter so it’s interesting to see how far I can get by simply vibe coding along.
I’ve read about the concept of a “Dark Factory” described where you don’t need to necessarily care about the exact quality of the code, so long as you clearly define your requirements, constraints and tools and the end product passes the testing suite then you can use. How true that turns out to be is essentially what I’m testing.
I started vibe coding with GitHub CoPilot extension in VSCode, having back and forth convos, incrementally implementing features on a somewhat chaotic way. This moved onto creating very large and comprehensive prompts with clearly defined technologies, layouts, user experiences, end results etc which did slightly better.
I then ultimately found a system called “BMAD - https://github.com/bmad-code-org" which I then started using from about v2 on a larger webapp I’m working on which I will eventually post about. But essentially it is using Google’s Antigravity, with a Google pro AI subscription to work through the BMAD method epic by epic, story by story, in the Gemini chat window of Antigravity. The main drawback is that I must have my laptop open and be in constant chat as Antigravity requires constant approval for tasks, something I’m looking to avoid.
The Plan#
I’m looking at starting a new website and I’d like to try a newer workflow using Claude Code over SSL on a virtual machine on my local hypervisor. They basic concept is:
- Build an Ubuntu Virtual Machine on my Proxmox host
- Install the necessary tools such as Claude Code, Antigravity, VSCode Web, Git, TMUX etc
- Perform the initial exploratory and doc creation stages of BMAD method in Antigravity with Gemini 3.1 pro
- Perform the architecture and epic creation stage of BMAD method in Antigravity with Opus 4.6 (thinking)
- Swap to headless coding in Claude Code, in multiple TMUX sessions over SSH, that can be re-connected to from any machine including my phone.
This will allow me to kick of a “Story” defined by BMAD and hopefully come back to a complete feature.
The Build#
First step is to build an Ubuntu Desktop 24.04 VM on my Proxmox host. This is a custom build from a Super Micro Dual Socket motherboard with 2x Xeon E5-26xx CPU, 192GB RAM with some HDD and SSD storage via a TrueNas VM.
VM Properties#
The specific properties I used for the VM was:
| Item | Value |
|---|---|
| Name | UbuDev01 |
| ISO Image | ubuntu-24.04.3-desktop |
| Guest OS Type | Linux |
| Guest OS Version | 6.x - 2.6 Kernal |
| Graphics Card | VirtIO-GPU |
| Machine | q35 |
| Qemu Agent | Checked |
| Disk size | 200GB |
| Disk Discard | Checked |
| Disk SSD emulation | Checked |
| CPU Type | Host |
| Sockets | 1 |
| Cores | 8 |
| Enabled NUMA | Checked |
| PCID | On |
| Memory | 16384 |
| Ballooning Device | Unchecked |
The Build Process#
Once Ubuntu OS was installed, I connected to the Desktop via Proxmox console using Virt-Viewer for Windows. I collect the IP address assigned via DHCP with the ip a command and then update and install some software:
# Update all packages
sudo apt update && sudo apt upgrade -y

# For good measure, check for dist upgrade
sudo apt dist-upgrade
Next, we will install SSH so I can perform the rest of this work over SSH for convenience:
# Install the package
sudo apt install openssh-server -y

# Enable the service
sudo systemctl enable --now ssh
With this done, I can now close the Virt-Viewer window and continue in the terminal.
Once connected over terminal with command ssh user@IP I continue the setup by mapping my network drives where I keep my code repositories:
sudo mkdir /mnt/docs
sudo vim /etc/fstab
# add <IP>:<TrueNasSharePath> /mnt/docs nfs auto,nofail 0 0
sudo mount -aNext we will install some basic packages to get working with:
sudo apt -y install curl git qemu-guest-agent nodejs npmAt this point I confirm that the option is set in Proxmox under VM > Options > QEMU Guest Agent and then reboot the VM to allow Proxmox to pick up the guest configuration now that the qemu-guest-agent package is installed and configured.
Next I like to assign static IPs to my VMs once they are created and we do this by updating the correct netplan file. I start by listing the files available as this seems to change over ubuntu versions:

I view both and can see that the IP Configuration is in the 50-cloud-init.yaml. It currently shows as:
network:
  version: 2
  ethernets:
    enp6s18:
      dhcp4: true
I update it to show the following:
network:
  ethernets:
    enp6s18:
      addresses: [<IP>/24]
      nameservers:
        addresses: [<nameserverip>]
      routes:
        - to: default
          via: <gatewayip>
  version: 2
I then apply these changes with:
sudo netplan applyand reboot again.
Configuring the Dev Tools#
Now the basics are configured, we can look at installing the tools needed to enable the vibe coding. The software I plan to use is:
- TMUX - https://github.com/tmux/tmux/wiki - A terminal multiplexer allowing the easy switching between several programs at once with the ability to detach and reattach for background tasks
- Claude Code - https://code.claude.com/docs/en/cli-reference - A CLI tool I can use via SSH to control the Coding Agents
- Gemini CLI - https://geminicli.com/ - The Google Gemini CLI tool I can use via SSH if needed.
- Google AntiGravity - https://antigravity.google/ - A VSCode/Windsurf fork with built in chat panel for Gemini Agents
- VSCode Server - https://code.visualstudio.com/docs/remote/vscode-server - Allows me to view the codebase via a webserver version of VSCode via browser from any device.
- Other Useful Utilities - There are several smaller packages I will install such as:
- BTOP - Process monitor like top
- Claude Code Monitor - View Claude code usage
These tools will also be installed per project folder as they will generate a folder and file structure that the AI Agents will use.
- BMAD: https://github.com/bmad-code-org - A web development framework for use with coding agents.
- BMAD Claude: https://github.com/aj-geddes/claude-code-bmad-skills - A version of BMAD optimized with use for Claude Code
TMUX#
Link: https://github.com/tmux/tmux/wiki
TMUX Installation#
To install TMUX, we simply use the apt package manager for Ubuntu:
sudo apt install tmux -yTMUX Basic Commands#
Conceptually understanding TMUX is helpful when navigating nested screens and menus. At the top level, we have a TUMX session. This is the overall container which we can name. Within this session we have windows. These are displayed along the bottom of a TMUX session and can be swapped between. Within each TMUX window we can “split” it into different panes.
This will install the package and allow us to start multiplexing our terminal. The basic commands I will be using to control TMUX are:
tmux new -s <sessionname>- Creates a new TMUX session with a specified nametmux attach -d <sessionname>- Attached to named sessiontumx attach- Attaches to most recent sessiontmux kill-session -t <sessionname>- Kill the named sessiontmux ls- Lists currently active sessions
TMUX Hot Key Combos#
There are also hot keys that must be pressed in sequence. Typically they start with holding Ctrl and pressing b, then releasing all buttons and pressing the hotkey you want. To be hyper specific in a few instances, when using special symbols like " or %. You must press shift and the corresponding number. So hold Ctrl, press b, release, hold Shift, press 2 and you’ll split the terminal horizontally.
Ctrl + bthend- Detaches from a session that is currently activeCtrl + bthen%or"- This will split the terminal vertically for%and horizontally for"Ctrl + bthen Arrow Keys - Moves around split terminal windowsCtrl + bthenPgUporPgDwn- Scrolls up and down terminal window to see previous outputCtrl + bthenAlt + Arrow- Resize pane
Claude Code#
Link: https://code.claude.com/docs/en/quickstart
Claude Code Installation#
Claude Code is the foundational tool that I will be using for the actual development of the websites. I find their models ideal. I only subscribe to the pro subscription (maybe if my side project websites generate an income I’ll upgrade to max), so I’m limited to the Sonnet 4.6 model at the moment. I do however also have a Google Pro subscription that gives me access to Opus 4.6 within the Antigravity tool so I will use that to plan the architecture and write the Epics/Stories/Tasks.
Claude Code CLI is installed on Ubuntu by:
curl -fsSL https://claude.ai/install.sh | bashOnce installed, it requested I run this command to add to my path folder:
echo 'export PATH="$HOME/.local/bin:$PATH"' >> ~/.bashrc && source ~/.bashrcClaude Code Usage#
Once installed, we can start a Claude Code session with claude. There are various switches we can add but this isn’t a Claude Code Guide. You will need to run through a quick setup wither you pick your theme and then connect to your account. It’s worth noting that this command would typically be run inside your project directory and not at the Ubuntu user home drive.
Once configured, we can move on.
Gemini CLI#
Link: https://geminicli.com/
Gemini CLI Installation#
First we must install some prerequisites to use Gemini CLI, namely NodeJS and NPM Package Manager. They are installed as follows:
# Install latest LTS version of Node JS
curl -fsSL https://deb.nodesource.com/setup_lts.x | sudo -E bash -
sudo apt-get install -y nodejs npm
No nodejs and npm are installed, we can simply run the command to install Gemini CLI:
sudo npm install -g @google/gemini-cliThis will install the Gemini CLI command
Gemini CLI Usage#
With the node package installed, we can run Gemini CLI with the command gemini. When we do so, we will be prompted to trust the current directory and then login. We would typically run this in the context of the project directory also.
WARN: Also worth noting that after logging in, the Gemini CLI restarted and hung my SSH session, I had to disconnect and reconnect which then allowed me to run it and interact with it.
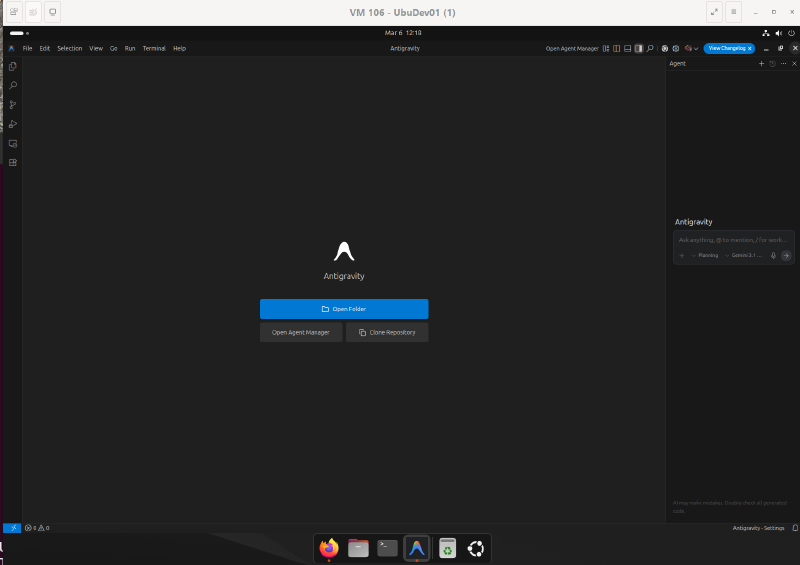
Google Antigravity#
Link: https://antigravity.google/download/linux
Google Antigravity Installation#
To install on Linux, we will run the following commands. First we need to add the repository to the sources.list.d:
sudo mkdir -p /etc/apt/keyrings
curl -fsSL https://us-central1-apt.pkg.dev/doc/repo-signing-key.gpg | \
  sudo gpg --dearmor --yes -o /etc/apt/keyrings/antigravity-repo-key.gpg
echo "deb [signed-by=/etc/apt/keyrings/antigravity-repo-key.gpg] https://us-central1-apt.pkg.dev/projects/antigravity-auto-updater-dev/ antigravity-debian main" | \
  sudo tee /etc/apt/sources.list.d/antigravity.list > /dev/null
The, we update the package cache and install the package:
sudo apt update
sudo apt install antigravity -y
Google Antigravity Usage#
After installation, as it’s not a CLI tool, I signed back into the desktop with Windows Virt-Viewer, opened it, pinned it to the dock and then ran through the setup. This involved selecting the dark theme (obviously) and then signing into google
VSCode Server#
Link: https://github.com/coder/code-server
VSCode Server Installation#
From the repo, there is a setup script that can be simply run to install. The command is:
curl -fsSL https://code-server.dev/install.sh | shAfter installation we are prompted to enable it as a service by running:
sudo systemctl enable --now code-server@$USERNext up, because I want to access it via a browser on other devices in my home via https://<server-ip>:8080, I need to bind port 8080 to 0.0.0.0. I need to update the config file as follows:
sudo vim ~/.config/code-server/config.yamlThe current bind-addr is “127.0.0.1:8080” , I will update this to read “0.0.0.0:8080”. I will also update the password to something more memorable.
After that, I will restart the service and should be able to access it in my browser:
sudo systemctl restart code-server@$USERVSCode Server Usage#
This is used just like normal VSCode except I can access it via https://<server-ip>:8080 from other devices in my house.
We are now at a stage where we can install some optional utilities to try with my intended coding workflow:
Other Utilities Installation and Usage#
The other utilities I plan to use will be somewhat experimental and they will likely change over time. I’ve done some research and will plan to start out with the following tools:
BTOP#
This is a slightly more stylised version of the command top used to monitor system performance in a Linux terminal.
It is installed with the native package manager with the following command:
sudo apt install btop -yOnce installed, you get this beautiful interface when using the command btop:

Claude Code Monitor#
This is a small terminal UI that will help you keep track of your Claude Code usage, useful to understand your subscription allowance and upcoming reset times. It is installed via UV which itself needs installed first:
curl -LsSf https://astral.sh/uv/install.sh | shOnce installed, we can install Claude Code Usage Monitor by running:
uv tool install claude-monitorOnce installed there are various alias’ to run it with various arguments. In my case, with the Claude Code pro plan, I will use the command:
claude-monitor --plan pro --theme dark --timezone Europe/LondonWhat’s next#
This is long enough for a setup and configuration post. In my next post, we will set up a project, use the different bmad tools to give skills/workflows to our agents, go through a project definition and the enter the coding loop.
Stay tuned.
